 |
||||||||||||||||||
|
The first thing I did was talk to Dave Bengel, who is the owner of Skyhook Models. If you've ever purchased a Skyhook product, you already know that quality goes into each piece that they produce. I asked Dave if he would be willing to teach me the ins and outs of molding and casting using our next project from Modeler's Resource David & Goliath. Dave responded with a slightly
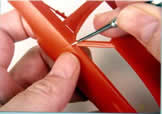
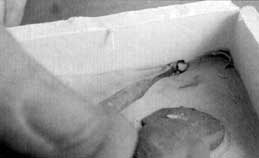
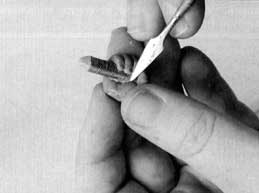
less than enthusiastic "yes" (knowing ahead of time the potential difficulties that awaited us), and that is how this article has been The second person I contacted was Randy at Bare-Metal Foil. They sell a full line of supplies everything you need for molding and casting. They were kind enough to provide me much of what I needed for this project in the way of Silicone Rubber, Resin, Once Dave said he was in and the folks at Bare-Metal indicated they would be willing to help with the project, the green light was fully blazing. Now, I sat back, waited for the product from Bare-Metal to arrive and for Dave and I to get a free day in our schedule to begin the process. It happened sooner than later and before I knew it, we were sitting at my dining room table looking at all the parts, with me particularly interested in watching Dave decide which parts would be molded together and exactly how the molds would be prepared. I found out a number of things as Dave guided me through the process of creating molds. First, I found out that this was fun. I was gaining some firsthand knowledge about something that had eluded me for quite some time and someone who was very good at it was teaching me. Second, I quickly realized that this is not something I would choose to do for a career. My hat is off to people like Dave and Mark who routinely do this, sometimes day in and day out. It's fun, but it's not that much fun! Give me an article to layout or type or a model to paint any day, thank you very much! The first thing Dave taught me is that the parts need to be somewhat embedded in a clay "floor." This is done by taking the clay and flattening it out, piece by piece and then laying the parts on top of that area , Once the parts are placed in positions that are satisfactory to the molder, then it's time to fill in the areas around each part so that there are no spaces, holes or irregularities surrounding each part. The clay then needs to be smoothed out nicely and excess clay should be removed. Whatever you leave behind will become imprinted in the rubber mold! You can look through the photos to see this process. . |
|||||||||||||||||
| Home | Bare Metal Foil | Molding Materials | Casting Resins | Starter Kit | Decals Items | Specialty Items | |
||||||||||||||||||


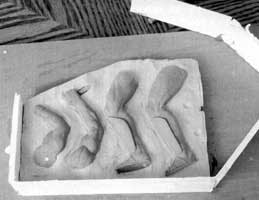 Above: Foam Core™ was used to create the wall
that encircled the mold. This wall was one piece
with creases, allowing it to bend at each corner. It
was cut off and taped when the last two corners
Above: Foam Core™ was used to create the wall
that encircled the mold. This wall was one piece
with creases, allowing it to bend at each corner. It
was cut off and taped when the last two corners