|
Creative Concrete with Homemade Stamping
BY MIKE HANCOCKStamped concrete that looks like stone or pavers usually is installed by contractors using sets of commercial stamps that can cost as much as $12,000. My company, Creative Concrete, is proof that you can make your own stamps and molds for a fraction of the cost and achieve spectacular results. The best part is that you don’t have to be a master with a finishing trowel to make a striking impression. The stamps themselves do all of the surfacing. I got started in the artistic concrete business a few years ago. I bought some latex rubber and began to experiment with stamp designs on my basement floor. The latex proved to be too soft and I made a mess of the floor, but I continued to test new materials and techniques until I got it right. Today I have homemade polyurethane rubber stamps to create the appearance of New York bluestone, cobblestone, and running bond pavers. One set of stamps, like the ones I made for this project, has been in steady use for more than two years. Creating concrete that looks like natural materials takes two things: color and texture. The color comes from bags of dry pigment I dump into the Redi-Mix truck when it arrives at the job and the powdered release agent I dash on the surface to prevent the stamps from sticking to the wet concrete. The texture comes from the stamps and molds .Natural paving is beautiful, but it has drawbacks. For instance, it’s difficult to get stones to fit together tightly to form a flat, even surface that will stay that way from season to season. My stone look-alike walks, on the other hand, provide the character of stone with the stability, uniformity, and design flexibility of concrete. I normally would charge about $4,000 for a 200-square-foot entry walk and an 8-by-10-foot stoop like the ones shown here, including demolition and removal of the old paving. However, you could make your own stamps for about $500 and create a textured surface yourself.
Making the Stamps To make concrete look like stone, start with stamps cast from real stone and two part polyurethane rubber. Order a 120-pound unit of Poly 75-80 polyurethane rubber from Polytek®. You will also need sealer and aerosol stamp release. The stones should be large and relatively flat, but with distinctive texture variations. I chose New York bluestone and redstone for these stamps. Some of the surface changes were a little too extreme, so I eased the edges with a hand sledge and a large cold chisel. Better to tame overly rough stones than to start with bland ones.
It doesn't’t matter if the stones are straight-cut or random, as long as they are big-2 feet by 3 feet is ideal. The object is to pour the gooey stamp material so it stops just short of the edges of the stone.
Often, stone yards will let you return materials and charge only a 10% to 15% handling fee. While you will need to seal the rough side of the stones with a transparent penetrating sealer, most people use stones smooth side up, so it shouldn't’t affect their resale. Plan to seal the stones at least one day before you use them so the sealer has time to dry fully.
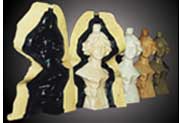
The stamps are made from resin and hardener that you mix, like two-part epoxy, just before you use it. Making the five stamps I used on this project took two 5-gallon pails of Part A (resin) and one 5-gallon pail of Part B (hardener). I mixed it in 3-gallon batches (2 gallons of Part A and 1 gallon of Part B) so it wouldn't’t begin to set up in the pail before I was finished using it.
You can mix the parts with a stick in a large bucket, but a right-angle mixer or heavy-duty drill equipped with a stirring paddle is faster and easier. Blend the ingredients for two minutes with a power mixer.
Rubber gloves and eye protection are musts when mixing or pouring liquid rubber. Lacquer thinner will get the polyurethane off your skin when wet, but nothing short of friction will remove it after it dries.
Once the two parts are blended you have less than 20 minutes of open time to pour the mixture. The warmer the temperature and the longer you mix the resin and hardener, the faster it sets.
Begin by spraying the stones with aerosol release to make them slippery. Then immediately pour the blended rubber goo on top. Pour slowly, starting in the middle of the stone, so the syrupy material has time to level itself. The object is to let the rubber run close to the edges without dripping over the sides.
Keep plenty of wooden shims ready to level the stones and control the spread of the liquid rubber as you pour. Shims also come in handy for spreading the rubber.
It’s better to pour the rubber in two or three thin layers than to attempt a thick pour. If you pour the rubber too thick, it will dribble over the sides as it self-levels.
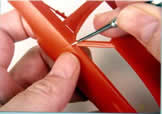
Let the rubber harden and cure for a day before you peel the stamps off the stones. If the rubber does ooze over an edge, cut it back with a sharp utility knife before you peel.
Don’t be concerned if the form begins to separate from the stone as it cures; that’s natural. In fact, the separation makes it easier to lift the stamps off the stones. The stamps should be thinner along the edges than they are at the center. This enables you to overlap the stamps as you texture large surfaces for a seamless effect.
Stamping After building the wooden forms and pouring the concrete, it’s time to use the stamps. My trademark in making concrete look like stone is to texture the vertical surfaces, such as the stair risers and nosings, as well as the flatwork. I accomplish this by lining the wooden forms with strips of stone stamps. I secure the strips with an Arrow electric brad nailer. The brads hold the strips but can be pulled afterward when the strips are reused.
To obtain void-free texturing on vertical surfaces, I vibrate the forms using a masonry nail chucked point first into a hammer drill. Press the nail head against the form and trigger the drill. As the nail bounces against the form, air pockets rise to the surface and the finer concrete and sand particles fill the voids.
Before you start to texture the horizontal surface, the concrete must be hard enough so you barely make an impression when you press your open hand against it.If you start too soon, you will sink.
Sinking is bad, but having the surface dry too fast and crust is even worse. On extremely hot or windy days, I order concrete with retarders and spray on evaporation retarder to prevent surface crusting and cracking.
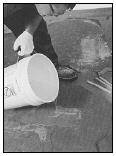
Before you begin to stamp the concrete, dust the surface with a coating of Antique Release powder, available from L.M. Scofield, (800) 800-9900. Dip a fat dashing brush into the bucket of release powder and send a cloud of powder over the fresh concrete with a flick of your wrist. Repeat the process until you cover all of the exposed concrete. Also coat the stamps with release powder.
Begin to lay the stamps on the concrete so the edges overlap slightly, leaving no voids. Press the stamps down into the concrete with the palms of your hands or, if you aren’t too heavy, by stepping on the stamps.
Position the stamps in a random pattern as you go to hide the fact that the texture repeats. Changing the orientation of a stamp and switching which stamps you overlap can produce many different texture details. You will need to dash more release powder on the stamps or the concrete if the stamps start to stick.
The nice thing about stamping concrete is that you see the effect as soon as you lift the stamp. If you don’t like it—say, the impression was weak—reposition the stamp and simply try again.
Finishing The day after the stamping, wash off the excess release powder. Scrub all of the powder off the high points, but leave some in the nooks and crannies. On this project, the gray-green release powder highlights the texture of the charcoal-colored concrete without looking unnatural. In this case, I used a pressure washer and a broad spray because it uses less water than a hose, reducing the mess from runoff. For maximum control, use a hose and broom.
Some sealers can be applied the same day, while others perform better if applied after the concrete cures for a month. Read the instructions on the label. Contact Bare-Metal at 800.628.7296 for more information or click here to purchase online Poly 75-80. Shopping Cart for this product is about mid-way down the page.
Special thanks to Polytek for providing this content. Copyright © 2001, Polytek Development Corp. All Rights Reserved. To view the physical properties table click here. . |
||||||||||||||||||||
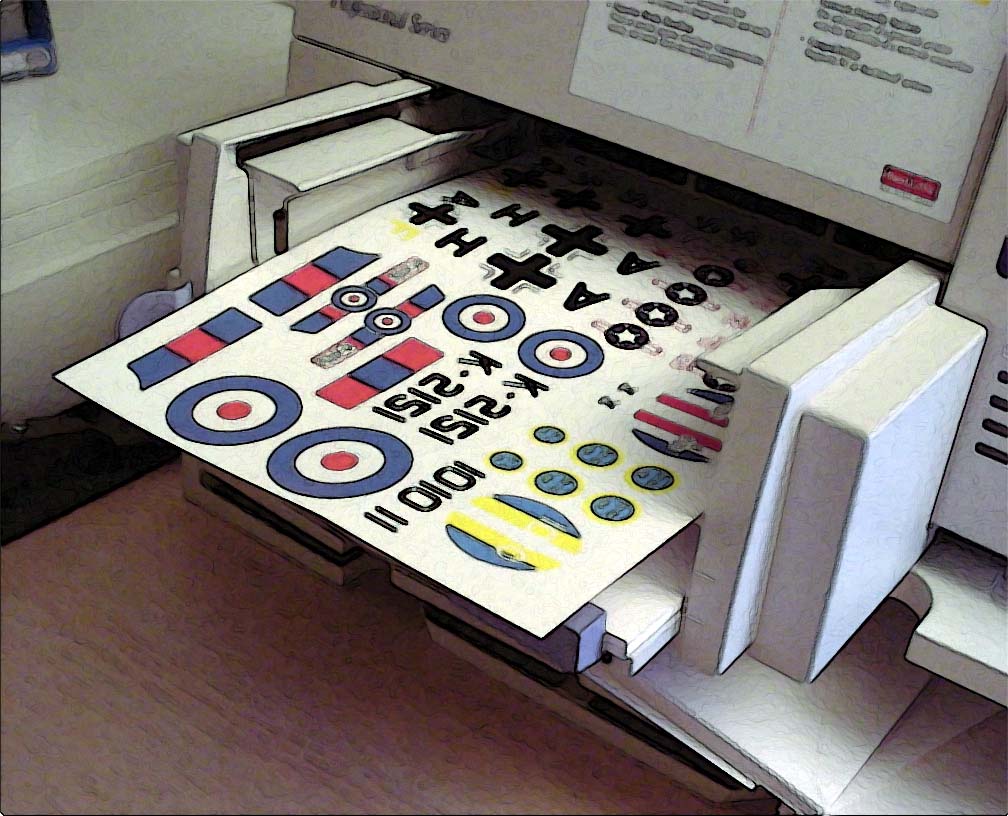
| Home | Bare Metal Foil | Molding Materials | Casting Resins | Starter Kit | Decals Items | Specialty Items | |
|||||||||||||||||||||

 Mike Hancock imprints a stone design into a smooth concrete walk using an inexpensive, easily made texturing tool created from